How to Stain and Finish a Concrete Patio Like a Pro
Reading time: 14 minutes
You’ve got a dull, gray concrete slab sitting outside your back door. Maybe it’s stained from years of barbecues, faded from sun exposure, or just plain boring. Here’s the thing — that slab isn’t a problem. It’s a canvas. With the right staining and finishing techniques, you can transform a forgotten patch of concrete into a stunning outdoor living space that looks like it was designed by a professional.
Whether you’re a first-timer with a bucket of acid stain and a YouTube tutorial queued up, or someone who’s tried DIY concrete finishing before and ended up with blotchy, uneven results, this guide is built for you. We’ll walk through every stage of the process — from surface prep all the way to long-term sealer maintenance — so you can achieve professional-grade results without hiring a professional-grade crew.
Well, here’s the straight talk: Staining concrete isn’t about slapping on some color and hoping for the best. It’s about understanding the material, respecting the process, and making a handful of smart decisions before you ever open a can.
Table of Contents
- Why Staining Your Concrete Patio Is Worth It in 2026
- Choosing the Right Stain: Acid vs. Water-Based
- Surface Preparation: The Step That Makes or Breaks Everything
- Applying the Stain Like a Pro
- Sealing and Finishing Techniques
- Common Challenges and How to Overcome Them
- Stain Type Comparison Table
- Popularity of Concrete Finishes in 2026
- Frequently Asked Questions
- Your Patio Transformation Roadmap: Next Steps
Why Staining Your Concrete Patio Is Worth It in 2026
Outdoor living spaces have become one of the hottest areas of home investment in recent years. According to a 2025 report by the American Society of Landscape Architects, demand for enhanced outdoor hardscaping — including decorative concrete — increased by 34% between 2022 and 2025. That number is only climbing in 2026 as homeowners continue to treat their patios as extensions of their interior living areas.
And the economics make sense. A professionally stained and sealed concrete patio can increase a home’s perceived outdoor living value by an estimated 10–15%, according to contractor surveys published in Concrete Decor Magazine in early 2026. Compare that to the cost of pavers (which can run $15–$30 per square foot installed) versus staining an existing slab ($2–$8 per square foot DIY), and the return on investment becomes very compelling.
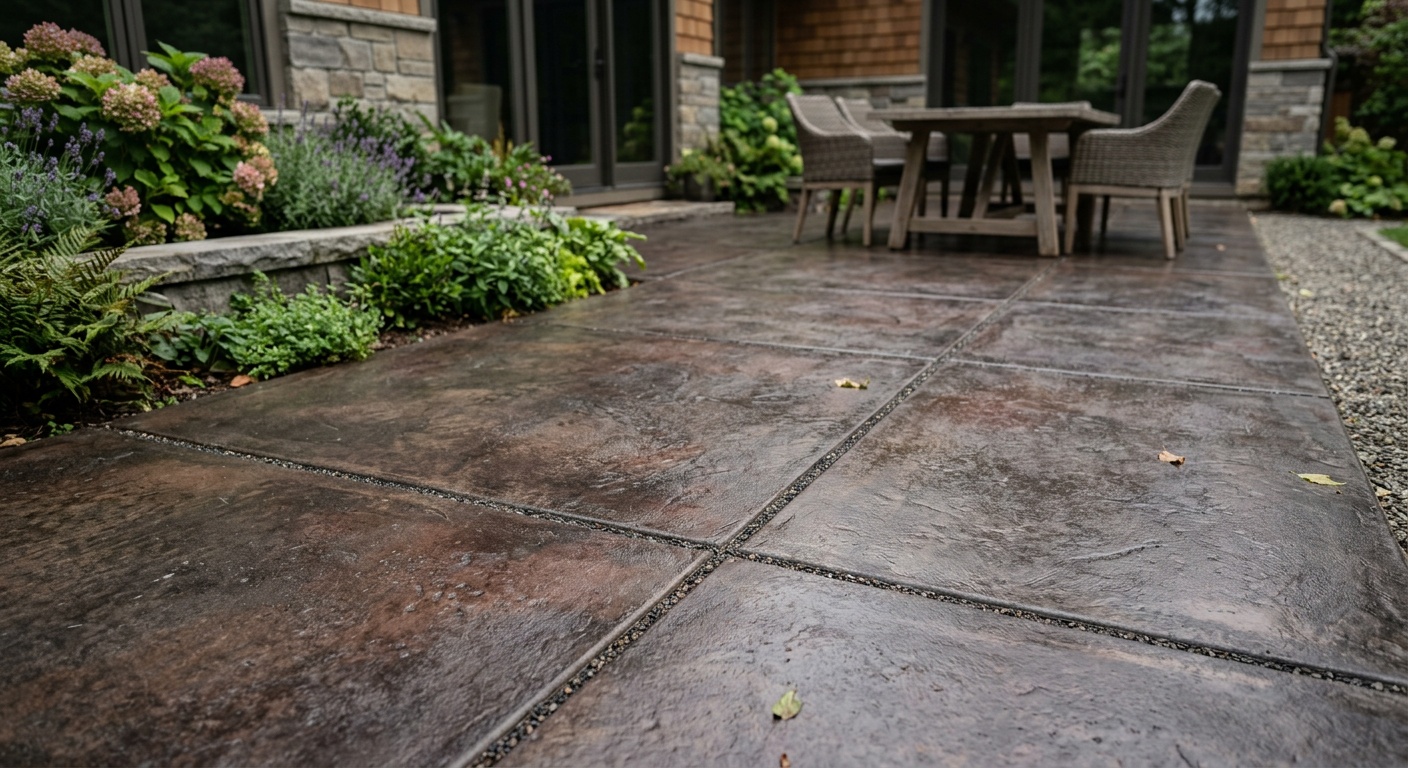
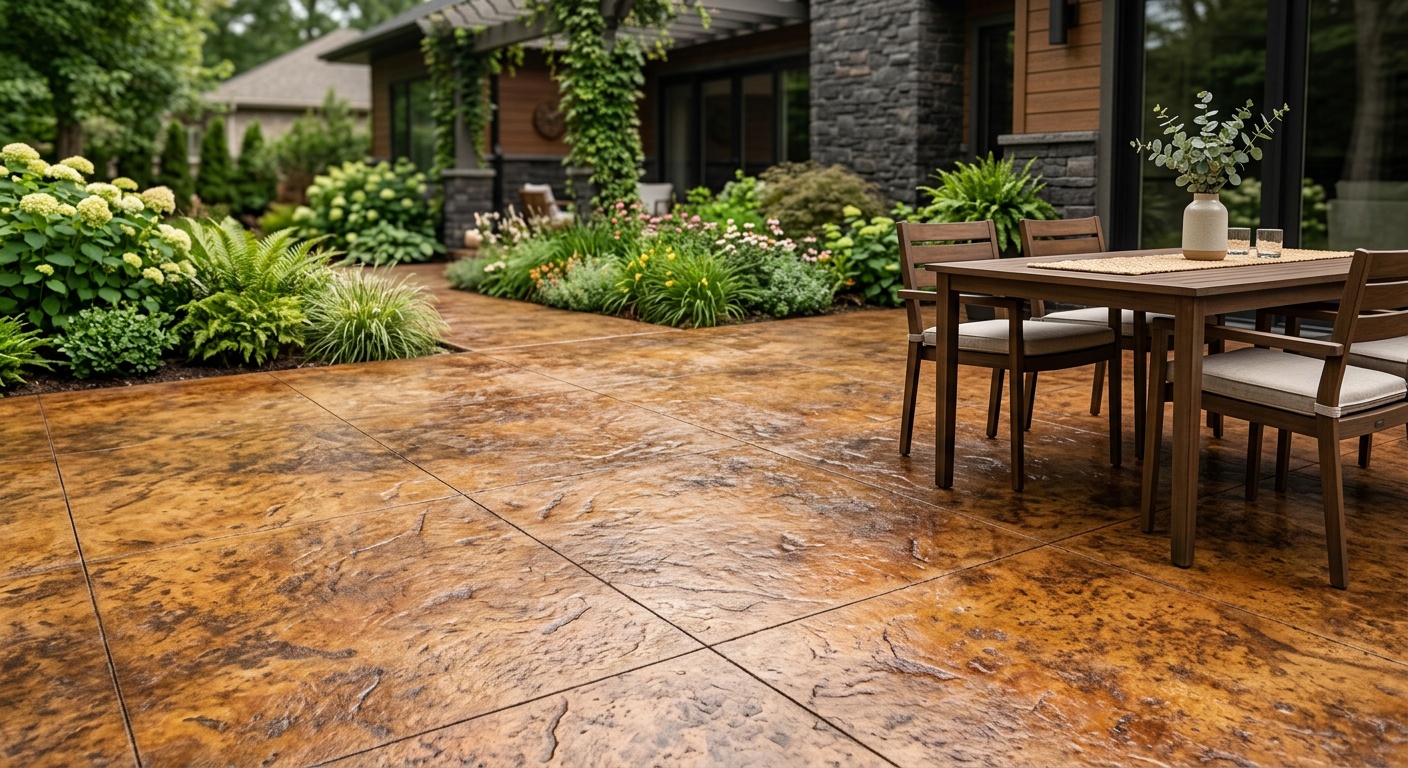
But beyond the numbers, there’s something deeply satisfying about taking a surface that looks like a parking lot and turning it into something that looks like a high-end resort. The transformation can be dramatic — think rich earthy browns, deep slate blues, or warm terracotta tones that shift with the light throughout the day.
What Modern Stained Concrete Can Achieve
Today’s concrete stains and finishes have evolved significantly. In 2026, homeowners have access to UV-stable water-based formulations that outperform the acid stains of a decade ago in terms of color consistency and ease of application. New reactive concrete dyes offer vibrant, deep hues that were previously only achievable through expensive overlay systems. And advanced penetrating sealers now offer 5–7 years of protection with a single coat — a genuine improvement over older products that needed reapplication every two years.
Quick Scenario: Imagine a suburban homeowner in Phoenix, Arizona. Their 400-square-foot concrete patio has turned a washed-out gray, with oil spots near the grill and white calcium deposits along the edges. Using a charcoal acid stain with a high-gloss sealer, they spend a weekend and about $280 in materials. The finished patio mimics the look of polished slate — a result a professional would charge $1,800–$2,400 to deliver. That’s a genuine, achievable win for the informed DIYer.
Choosing the Right Stain: Acid vs. Water-Based
Before you buy anything, you need to understand what’s actually happening when you stain concrete — because it directly affects which product you should choose.
Acid-Based Stains: The Classic Choice
Acid stains (also called reactive stains) work through a chemical reaction between the acidic solution — typically containing hydrochloric acid and metallic salts — and the calcium hydroxide in the concrete. This reaction permanently bonds the color to the surface. Because it depends on the existing chemistry of your slab, results are inherently variable, which is actually part of the appeal: you get natural-looking mottling, variation, and depth that looks authentically aged rather than painted on.
Key characteristics of acid stains:
- Permanent — won’t peel, chip, or fade from UV exposure
- Produces a variegated, organic look with natural color variation
- Limited color palette (mostly browns, tans, greens, and blues)
- Requires neutralization and thorough rinsing before sealing
- Involves hazardous chemicals — proper PPE (gloves, respirator, eye protection) is mandatory
- Not suitable for previously sealed or painted concrete without mechanical surface prep
Water-Based Stains: The Modern Workhorse
Water-based concrete stains use acrylic pigments that penetrate the surface pores rather than reacting chemically. They’re easier to apply, available in a much wider color range, and significantly less hazardous than acid stains. They also produce more consistent, predictable color — which can be a pro or a con depending on your design goals.
Key characteristics of water-based stains:
- Wide color palette — virtually any color is achievable
- Non-hazardous and low-VOC (especially important in 2026, given tightening EPA VOC regulations in several states)
- More predictable, uniform finish
- Faster drying time (typically 4–8 hours to recoat)
- May require more coats to achieve rich depth
- Less permanent than acid stains — some fading possible over time without proper sealing
Pro Tip: If you’re staining a newer slab (less than 5 years old) with minimal surface damage, water-based stains are generally the better starting point. If you want the most authentic, organic look — particularly for a slab with interesting texture and character — acid stains are hard to beat.
Surface Preparation: The Step That Makes or Breaks Everything
Ask any professional concrete finisher what separates great results from disappointing ones, and they’ll tell you the same thing: preparation. You could have the most expensive stain on the market, but if your surface isn’t properly prepared, the results will be uneven, blotchy, and potentially non-adhesive.
Here’s your preparation roadmap:
Step 1: Test Your Concrete
Before anything else, determine whether your concrete can even accept a stain. Pour a small amount of water on the surface. If it absorbs within 30 seconds, you’re likely dealing with unsealed, porous concrete — ideal for staining. If it beads up and sits on the surface, there’s an existing sealer or treatment that must be removed first.
Also perform a pH test using pool testing strips or concrete-specific test kits (available at most hardware stores for under $15). Ideal concrete pH for acid staining is between 7 and 9. Very high pH (above 10) can inhibit the acid reaction; very low pH may indicate contamination.
Step 2: Clean the Surface Thoroughly
Concrete is porous, which means it’s been absorbing everything for years — oil, grease, dirt, mineral deposits, and biological growth. Each of these contaminants will block stain penetration and create spots or voids in your final color.
Your cleaning sequence:
- Degrease: Apply a concrete degreaser (TSP or commercial concrete cleaner) to any oil stains, scrub with a stiff brush, and rinse thoroughly.
- Pressure wash: Use a pressure washer at 2,000–3,000 PSI with a fan tip. Work in overlapping passes. Allow 24–48 hours to dry completely.
- Etch (if needed): For acid staining, a light muriatic acid etch opens the surface pores. Mix 1 part muriatic acid to 10 parts water, apply with a plastic watering can, scrub, neutralize with baking soda solution, and rinse well. Always add acid to water — never the reverse.
- Inspect and repair: Fill cracks wider than 1/8 inch with a concrete patching compound. Sand smooth when cured. Small hairline cracks can actually add character when stained.
Case Study: A contractor in Nashville, Tennessee shared in a 2025 Concrete Network forum post that 70% of the callback complaints he received about blotchy staining were traced back to inadequate cleaning — specifically oil contamination from outdoor grills and vehicles. His team now spends 40% of total project time on surface preparation alone, and their rework rate has dropped to under 3%.
Applying the Stain Like a Pro
This is where most DIYers get excited and rush — and where most mistakes happen. Take your time here.
Tools You’ll Need
- Pump garden sprayer (for acid stains) OR low-nap paint roller/brush (for water-based)
- Acid-resistant plastic sheeting to protect adjacent surfaces
- Painter’s tape for edges and patterns
- Baking soda and water solution (for neutralizing acid stains)
- Shop vacuum and mop for residue removal
- Protective gear: chemical-resistant gloves, safety glasses, rubber boots, respirator
Application Technique for Acid Stains
Load your acid stain into a dedicated plastic pump sprayer (never metal — the acid will corrode it). Apply in a circular or overlapping figure-8 motion to encourage natural variation. Don’t spray in straight lines — this creates unnatural striping. Apply one light coat and allow it to react for 4–8 hours, or overnight for deeper color. The surface will look greenish or brown and bubbly as the reaction occurs — this is normal.
After the reaction period, neutralize with a baking soda and water solution (roughly 1 pound per gallon of water). Scrub thoroughly, then rinse multiple times. Use a wet/dry vacuum to remove all residue. This step is critical — any remaining acid will compromise your sealer adhesion.
Application Technique for Water-Based Stains
Apply water-based stains with a low-nap roller or soft-bristle brush. Work in small sections (about 4×4 feet) and maintain a wet edge to avoid lap marks. Two to three thin coats almost always produce better results than one heavy coat. Allow each coat to dry fully (follow manufacturer specifications — typically 4 hours in moderate temperatures). Lightly sand between coats with 220-grit sandpaper on a pole sander if you notice any raised grain or texture irregularities.
Pro Tip: For a more artistic, layered look, try applying a base coat of one color, then adding a second color in random overlapping sections with a damp sea sponge. This technique mimics the natural variation of acid staining while giving you full control over the color palette.
Sealing and Finishing Techniques
Staining is only half the equation. A stained concrete surface without sealer is vulnerable to UV fading, water penetration, oil staining, and abrasion. The sealer is what protects your investment and determines the final appearance of your patio.
Types of Concrete Sealers
Acrylic Sealers: The most common choice for DIY applications. Available in water-based and solvent-based formulations, with gloss levels ranging from matte to high-gloss. Water-based acrylics are lower-VOC and easier to apply; solvent-based acrylics tend to enhance color depth more dramatically. Typical lifespan: 2–4 years with proper maintenance.
Polyurethane Sealers: More durable than acrylics, with better resistance to abrasion and chemicals. Ideal for high-traffic patios. Tend to yellow slightly over time in UV-exposed areas unless specifically formulated as UV-stable. Typical lifespan: 4–6 years.
Epoxy Sealers: Extremely durable and chemical-resistant. Commonly used in garage floors but can be applied to patios. Creates a thick, plastic-like finish. Not ideal for outdoor concrete in freeze-thaw climates because it can trap moisture and cause delamination.
Penetrating Sealers (Silane/Siloxane): These soak into the concrete rather than forming a surface film, making them invisible. They don’t change the appearance of the stain but provide excellent moisture and freeze-thaw protection. Often used as a primer layer beneath an acrylic topcoat in colder climates.
How to Apply Sealer Correctly
Timing matters. Apply sealer only after the stain has fully dried and the surface is free of residue — typically 24 hours after final rinse and cleaning. Temperature should be between 50°F and 85°F with no rain forecast for 24 hours after application.
- Apply the first coat thinly using a roller, foam applicator, or low-pressure sprayer.
- Allow to dry per manufacturer specs (usually 2–4 hours for acrylics).
- Apply a second coat in a direction perpendicular to the first.
- For high-gloss finishes, a third coat can be added after the second has cured for 24 hours.
- Allow full cure of 48–72 hours before placing furniture or foot traffic.
Pro Tip: Thin solvent-based sealers can be applied in very thin coats for better penetration — up to 10–15% thinning with xylene is sometimes recommended by manufacturers. Always check the product’s technical data sheet before thinning.
Common Challenges and How to Overcome Them
Even experienced DIYers encounter problems. Here are the three most common issues and exactly how to handle them.
Challenge 1: Blotchy or Uneven Color
Why it happens: Inconsistent surface porosity, leftover contamination, or uneven application technique.
Solution: For water-based stains, additional coats can even out variation. For acid stains, the variegated effect is often intentional — but if patches are too extreme, a second application of stain (after neutralizing and drying the first) can fill in lighter areas. Always test a second application in an inconspicuous corner first.
Challenge 2: Sealer Bubbling or Turning White (Blushing)
Why it happens: Moisture trapped beneath the sealer, applied during high humidity, or applied too thickly.
Solution: Strip the affected sealer using xylene (for solvent-based) or a chemical stripper (for water-based). Allow the surface to dry thoroughly — ideally 3–5 days of warm, dry weather. Reapply in thinner coats. In humid climates, choose a penetrating sealer or moisture-tolerant formulation specifically rated for high-humidity applications.
Challenge 3: Peeling or Flaking After 6–12 Months
Why it happens: Insufficient surface preparation, an existing sealer that wasn’t removed, or using an interior-grade product outdoors.
Solution: Mechanical prep (grinding or scarifying) followed by reapplication. This is a more serious issue, but it’s entirely preventable with thorough prep work upfront. Always confirm your products are rated for exterior use and for freeze-thaw cycling if you’re in a cold climate.
Stain Type Comparison Table
| Feature | Acid Stain | Water-Based Stain | Concrete Dye | Overlay/Microtopping |
|---|---|---|---|---|
| Color Range | Limited (earthtones) | Extensive | Very extensive | Extensive |
| Durability | Excellent (permanent) | Good | Good (needs UV sealer) | Excellent |
| DIY Difficulty | Moderate–High | Low–Moderate | Moderate | High |
| Avg. Material Cost (per sq. ft.) | $0.50–$1.50 | $0.30–$1.00 | $0.60–$1.80 | $2.00–$5.00 |
| Look & Feel | Natural, variegated | Solid, consistent | Vibrant, even | Smooth, polished |
Popularity of Concrete Finishes in 2026
Based on 2025–2026 survey data from the Concrete Decor Industry Report, here’s how different finishing methods rank among homeowners undertaking DIY outdoor projects:
82%
65%
48%
31%
22%
* Percentages reflect share of DIY concrete finishing projects using each method (multiple selections allowed)
Frequently Asked Questions
Can I stain a concrete patio that already has cracks or surface damage?
Yes — but you need to manage expectations and repair strategically. Hairline cracks (under 1/8 inch) can often be left as-is, as staining will simply darken them and add to the natural character of the surface. Wider structural cracks should be filled with a flexible polyurethane concrete caulk or a matching concrete patching compound before staining. Be aware that repaired areas may absorb stain differently than the surrounding concrete, creating visible variation. Many homeowners actually lean into this by using it as part of the design — incorporating cracks into a “map” or “tile” pattern effect using tape and stencils. If the damage is severe (extensive spalling, deep delamination), an overlay system may be a more appropriate solution than staining alone.
How long does a stained concrete patio last, and how do I maintain it?
The stain color itself — particularly with acid stains — is essentially permanent, because it becomes chemically bonded to the concrete. What degrades over time is the sealer, not the stain. A quality acrylic sealer on a residential patio typically lasts 2–4 years before needing reapplication; polyurethane sealers can last 5–7 years. Signs that resealing is needed include water that no longer beads on the surface, a dull or chalky appearance, and visible wear patterns in high-traffic areas. Annual maintenance is simple: sweep regularly, clean with a pH-neutral cleaner (avoid vinegar or citrus-based cleaners, which can etch the sealer), and reapply a fresh sealer coat when needed. In 2026, many manufacturers now offer single-coat “refresh” sealers that can be applied directly over existing sealers without stripping — a significant time-saver for maintenance cycles.
Do I need to hire a professional, or is this truly a DIY-friendly project?
For most homeowners with a standard flat patio slab in reasonable condition, this is genuinely a DIY-friendly project — especially with water-based stains and acrylic sealers. The key variables are surface preparation quality, attention to detail during application, and appropriate product selection for your climate. Where professional help genuinely pays off: very large patios (over 800 square feet), complex decorative patterns requiring saw cutting or stenciling, heavily damaged slabs requiring grinding and overlay work, or climates with extreme temperature swings requiring specialized sealer systems. The 2026 DIY hardware market has also made this more accessible than ever — most big-box stores now carry complete concrete staining kits with detailed instructions, and manufacturer technical support lines have expanded significantly. If you’re attempting acid staining for the first time, seriously consider hiring a pro for the first project on a highly visible area, then use that experience to DIY future applications on outbuildings or secondary spaces.
Your Patio Transformation Roadmap: Next Steps
You now have everything you need to approach your concrete patio project with genuine confidence — not the dangerous overconfidence that leads to blotchy slabs and wasted weekends, but the well-grounded confidence that comes from understanding the why behind every step.
Here’s your action-oriented roadmap to get started:
- Assess your slab this week. Do the water absorption test. Check the pH. Identify stains, cracks, and any existing sealers. Take photos so you can track your progress — and to share the transformation when you’re done.
- Choose your stain type based on your surface and goals. Older, character-rich slab? Consider acid stain. Newer slab with a specific color vision? Water-based gives you more control. Not sure? Buy a small sample of each and test on an inconspicuous corner.
- Block out a proper prep weekend before your staining weekend. Don’t try to clean and stain in the same two-day window. Give your surface the 48–72 hours of dry time it needs after deep cleaning.
- Invest in quality PPE and the right application tools. This is not the place to cut corners. A $15 respirator and $8 acid-resistant gloves could save you a hospital visit.
- Seal within 24 hours of completing your final stain layer. Don’t let a freshly stained surface sit exposed to foot traffic, weather, or UV rays. The sealer is the finish line — don’t skip it.
Here’s the bigger picture: the outdoor living revolution is accelerating. In 2026, patios aren’t just places to put a table and some chairs — they’re designed extensions of the home, with defined zones for dining, lounging, and entertaining. A beautifully finished concrete patio is foundational to that vision, and it’s one of the most cost-effective upgrades you can make to your property.
So here’s the question worth sitting with: What would your outdoor space look like if you treated it with the same care and intention as your interior rooms? Your concrete slab already knows the answer. Now it’s your move.