Cheapest Ways to Cover or Upgrade an Existing Concrete Patio
Reading time: 14 minutes
You’ve got a cracked, stained, or just plain ugly concrete patio staring back at you every time you step outside. Maybe it looked decent when it was poured years ago, but now it’s become an eyesore — and ripping it out entirely feels like overkill (and a serious hit to your wallet). Here’s the good news: you don’t need to demolish everything and start from scratch. With the right approach, you can transform that tired slab into something genuinely beautiful for a fraction of the cost of replacement.
In 2026, homeowners are increasingly turning to budget-smart patio upgrades that deliver high visual impact without draining their renovation budget. Whether you’re prepping for outdoor entertaining, increasing your home’s resale value, or simply reclaiming your backyard as a usable living space, this guide walks you through the most cost-effective options — from DIY-friendly fixes to semi-professional solutions — with honest pricing, real-world examples, and practical steps you can act on today.
Table of Contents
- Why Cover Instead of Replace?
- Assess Your Slab Before You Start
- The Cheapest Cover and Upgrade Options Ranked
- Cost Comparison Table
- Budget Impact Visual Guide
- DIY vs. Hiring a Pro: When Each Makes Sense
- Real-World Transformations: Two Case Studies
- Common Challenges and How to Overcome Them
- Frequently Asked Questions
- Your Patio Transformation Roadmap
Why Cover Instead of Replace?
Concrete removal is expensive, messy, and disruptive. In 2026, the average cost to remove and haul away a standard 300-square-foot concrete patio runs between $1,200 and $2,800 — and that’s before you’ve spent a single dollar on the new surface. When you factor in the cost of pouring fresh concrete (typically $6 to $10 per square foot), you’re looking at a total project cost of $3,000 to $5,800 just to end up with… another plain concrete patio.
Covering your existing slab sidesteps demolition entirely. You’re essentially using the old concrete as a subfloor — which, assuming it’s structurally sound, is perfectly acceptable for most overlay and covering methods. The savings are dramatic, and the design possibilities in 2026 are more impressive than ever, thanks to innovations in concrete overlays, composite decking technology, and affordable paving materials.
Bottom line: Unless your slab is severely heaved, crumbling from rebar corrosion, or has major drainage issues, covering it is almost always the smarter financial move.
Assess Your Slab Before You Start
Before spending a dime on materials, walk your patio and do a quick health check. This step will save you from making a costly mistake — like applying a beautiful overlay over a slab that’s about to fail.
What to Look For
- Surface cracks: Hairline cracks (under ¼ inch wide) are cosmetic and can be filled before covering. Cracks wider than ½ inch, especially those with vertical displacement (one side higher than the other), indicate structural movement.
- Spalling and flaking: Surface deterioration is common and usually treatable with an overlay or resurfacer before covering.
- Drainage slope: Your slab should pitch away from the house at roughly ⅛ to ¼ inch per foot. If water pools on the surface, some covering methods (like pavers or tiles) can actually help redirect flow with proper installation.
- Heaving or sinking: If sections have shifted significantly, this suggests soil movement underneath. Minor heaving can be shimmed under certain materials; major heaving needs professional attention first.
- Moisture issues: Do the plastic sheet test — tape a 12-inch square of plastic sheeting to the slab for 24 hours. If moisture condenses beneath it, you have a vapor problem that must be addressed before applying adhesive-based products.
The Quick Soundness Test
Grab a metal rod or a simple hammer and tap across the surface. A solid thud means the concrete beneath is intact. A hollow or “drum-like” sound indicates delamination — sections where the concrete has separated internally. Those areas need patching before you proceed with any overlay or bonded surface treatment.
Pro Tip: Don’t skip the assessment phase in your eagerness to get started. A $15 bag of concrete patch compound used upfront can prevent a $400 overlay from failing six months later.
The Cheapest Cover and Upgrade Options Ranked
Here are the most affordable and practical methods available in 2026, ranked roughly from lowest to highest cost per square foot. Each has distinct pros, cons, and ideal use cases.
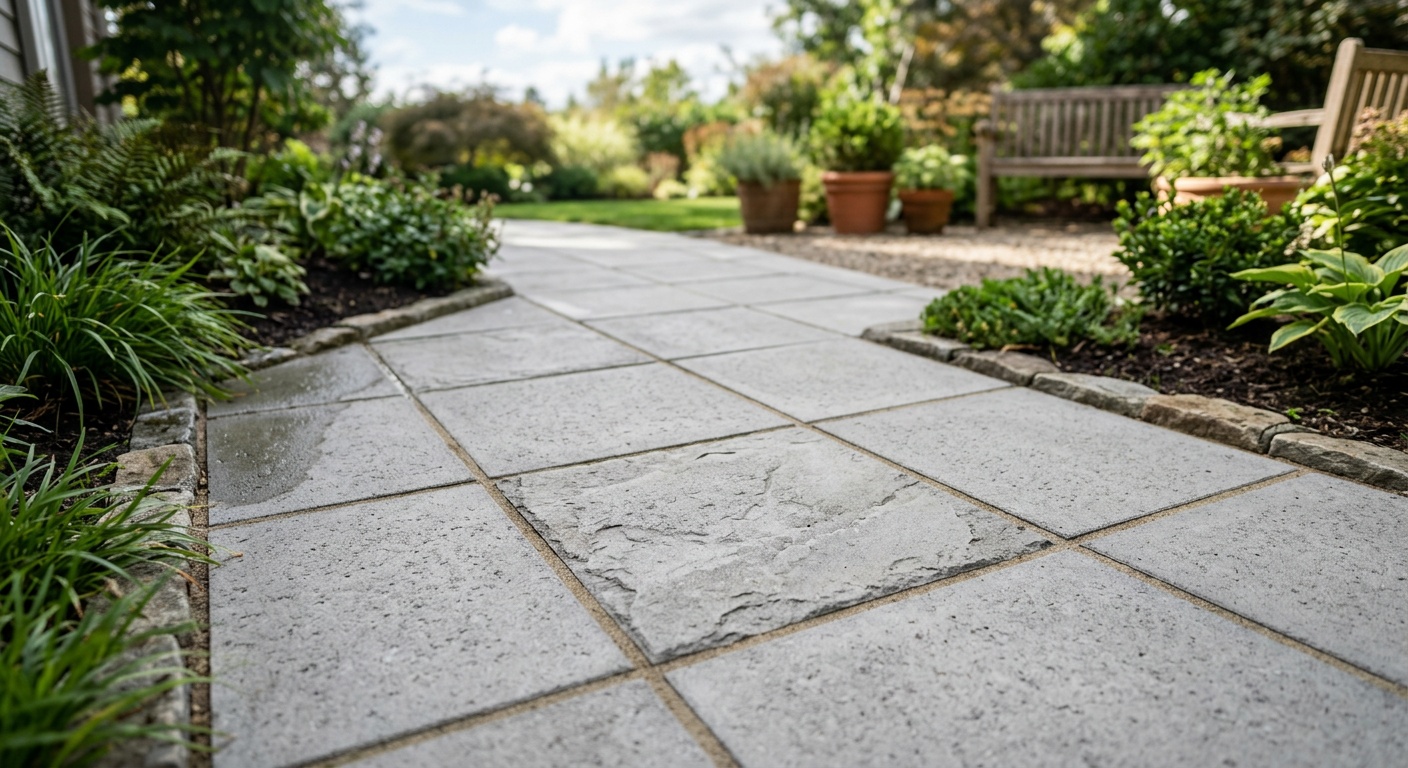
1. Concrete Resurfacing (Overlay)
Concrete resurfacer is a polymer-modified cement product that bonds to your existing slab and creates a fresh, smooth surface. It’s one of the most budget-friendly options available — typically costing $1.50 to $3.50 per square foot for materials if you DIY, or $4 to $7 per square foot professionally applied.
You can apply it plain (for a clean, minimalist look), use a broom to create texture, or use stamps and stencils to mimic the look of stone, slate, or brick. Modern micro-topping products — thinner, smoother versions of traditional overlays — have become increasingly popular in 2026 for their polished, contemporary look.
- Best for: Cosmetically damaged slabs in good structural condition
- DIY-friendly: Yes, with proper prep
- Durability: 8–15 years with proper sealing
- Watch out for: Requires moisture testing; won’t bridge major cracks
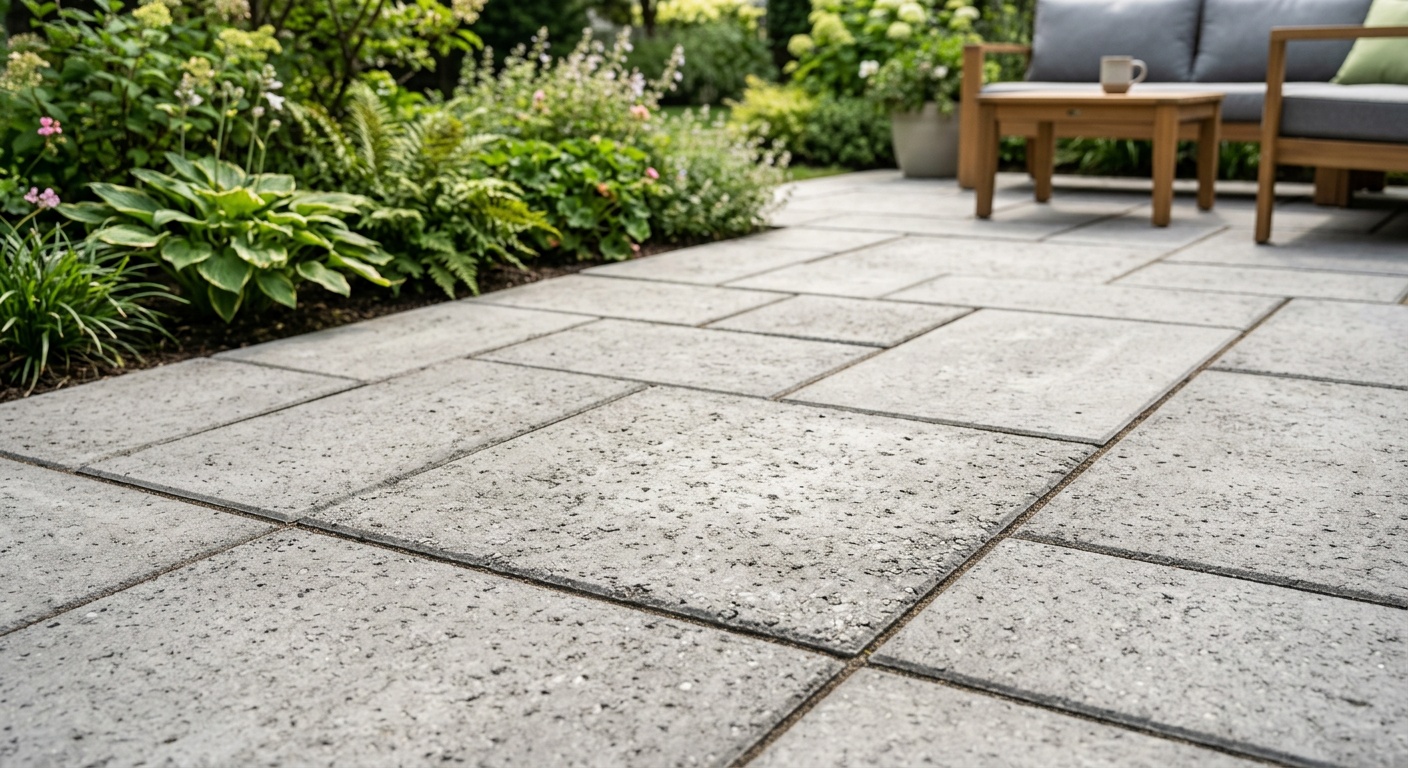
2. Outdoor Porcelain or Ceramic Tile Over Concrete
Setting tile directly over a concrete slab is a classic technique that delivers a high-end look at a reasonable price point. Budget porcelain tiles in 2026 start around $1.00 to $2.50 per square foot for the material, though installation materials (mortar, grout, waterproofing membrane) add another $1.50 to $2.00 per square foot. DIY installation is achievable for most homeowners comfortable with basic tiling.
Outdoor-rated porcelain with a slip-resistant finish is the go-to recommendation for patios. The key requirement is a stable, crack-free slab — significant movement will cause grout lines to crack. For areas with freeze-thaw cycles, use full-bodied porcelain (not ceramic) rated for frost resistance.
- Best for: Stable slabs in mild-to-moderate climates
- DIY-friendly: Moderate difficulty
- Durability: 15–25 years
- Watch out for: Slab movement will crack grout; avoid glazed tiles outdoors
3. Interlocking Deck Tiles (Snap-Together)
Perhaps the most renter-friendly and genuinely DIY option on this list, interlocking deck tiles simply snap together over any flat surface — no adhesive, no mortar, no tools required. They’re available in real wood, composite, stone, and porcelain variations, with composite options starting around $2.00 to $4.50 per square foot in 2026.
They’re ideal for patios where you want flexibility — they can be removed and rearranged, taken with you if you move, or replaced tile by tile if one gets damaged. The main limitation is that they add about ¾ to 1.5 inches of height, which can create a trip hazard at entry doors if clearance is tight.
- Best for: Renters, temporary setups, or anyone wanting zero-commitment transformation
- DIY-friendly: Very easy — no special skills needed
- Durability: 5–12 years depending on material
- Watch out for: Height addition at doorways; gaps can collect debris
4. Gravel or Decomposed Granite Over Partial Areas
For patios that extend into a yard area, or where you want to break up the monotony of solid concrete, adding a gravel or decomposed granite border or transition zone costs as little as $0.50 to $1.50 per square foot for materials. This is particularly effective when combined with raised planters or garden edging to create defined zones.
This isn’t a “cover the concrete” solution per se — it’s more of an enhancement strategy that uses the concrete as the centerpiece and builds a more attractive outdoor room around it.
5. Concrete Stain and Sealer
If your slab is in decent shape and you just want a dramatic visual upgrade with minimal cost, acid staining or water-based concrete staining is extraordinarily affordable. Materials for a DIY stain-and-seal project run $0.50 to $1.50 per square foot, making it the cheapest “upgrade” option available.
Acid stains create permanent, variegated color that looks like natural stone — no two stained slabs look alike. Water-based stains offer more predictable, uniform color and are easier for beginners. Both require a clean, prepared surface and finish with a UV-resistant sealer for longevity.
- Best for: Structurally sound, relatively clean slabs
- DIY-friendly: Yes, though prep work is critical
- Durability: 3–7 years before resealing is needed
- Watch out for: Won’t hide major cracks or deep stains; acid stain requires careful chemical handling
6. Rubber Patio Tiles
Originally popularized in gym flooring, outdoor rubber tiles have evolved significantly and are now available in attractive wood-grain and stone-pattern designs. Priced at $1.50 to $3.50 per square foot, they offer comfort underfoot, slip resistance, and easy installation — just lay them over clean concrete.
They’re particularly practical in 2026 for households with young children or elderly family members who value cushioning and slip prevention. The drawback is longevity — cheaper rubber tiles can fade, curl at the edges, or develop odor issues in hot climates.
Cost Comparison Table
| Option | DIY Cost/sq ft | Pro Installed/sq ft | Lifespan | DIY Difficulty |
|---|---|---|---|---|
| Concrete Stain + Seal | $0.50–$1.50 | $2–$4 | 3–7 years | Easy |
| Concrete Resurfacing | $1.50–$3.50 | $4–$7 | 8–15 years | Moderate |
| Interlocking Deck Tiles | $2.00–$4.50 | $4–$7 | 5–12 years | Very Easy |
| Porcelain Tile | $2.50–$4.50 | $6–$12 | 15–25 years | Moderate–Hard |
| Rubber Patio Tiles | $1.50–$3.50 | $3–$6 | 5–10 years | Easy |
Budget Impact Visual Guide
Below is a visual comparison of approximate total DIY project costs for a standard 200-square-foot patio using each method:
~$200
~$500
~$600
~$800
~$900
*Estimates based on 200 sq ft, mid-range materials, DIY labor. Costs vary by region and supplier.
DIY vs. Hiring a Pro: When Each Makes Sense
The most budget-conscious approach is almost always DIY — but that calculus changes depending on the scope, your skill level, and the specific method you choose.
Go DIY If…
- You’re using interlocking tiles, rubber tiles, or stain/seal — all three are genuinely beginner-friendly
- Your patio is under 300 square feet
- The slab only has minor cosmetic issues that you’ve already patched
- You have a full weekend available (most projects take 1–2 days, plus cure time)
Hire a Pro If…
- You’re using stamped overlay or decorative concrete — application consistency matters enormously here
- You’re tiling over 300+ square feet with porcelain, especially in a climate with freeze-thaw cycles
- Your slab has significant cracks or moisture issues requiring professional assessment
- You want a warranty on workmanship — most reputable concrete overlay contractors in 2026 offer 2–5 year labor warranties
A word of practical wisdom: Even if you hire a contractor for the main application, you can save 20–30% by doing your own prep work — cleaning the slab, filling minor cracks, and removing old sealers before the pro arrives.
Real-World Transformations: Two Case Studies
Case Study 1: The $340 Backyard Revival in Phoenix, Arizona
In early 2025, a homeowner in Phoenix with a 180-square-foot patio decided to tackle a slab that had faded and picked up deep rust stains from old patio furniture. Demolition quotes came in at $1,400. Instead, she opted for a DIY acid stain project combined with a two-coat penetrating sealer.
Total materials cost: $310 — including etching solution, acid stain in a terracotta blend, neutralizing solution, and a high-solids acrylic sealer. She spent one Saturday on prep and cleaning, one Sunday applying the stain, and sealed it the following weekend after cure time. The result was a mottled, natural-stone appearance that completely transformed the look of her outdoor space. When she listed the home for sale in mid-2025, her real estate agent noted the patio as a specific selling point. Total ROI: substantial, for a project that cost less than a tank of gas per square foot.
Case Study 2: The Composite Tile Upgrade in Portland, Oregon
A Portland homeowner with a 240-square-foot patio faced a different problem: the slab itself was in acceptable condition, but it sloped awkwardly and collected leaves in a low corner. Rather than address the drainage issue (which would have cost $800+ to properly regrade), he installed interlocking composite wood-grain deck tiles in a herringbone pattern in early 2026. The tiles — purchased during a January clearance sale for $2.60 per square foot — elevated the surface evenly across the patio, visually minimizing the slope.
Total project cost: $680 for materials and tools (a circular saw for perimeter cuts, a tape measure, and a rubber mallet). Installation took one afternoon. The result was a warm, wood-textured outdoor living space that looked far more expensive than it was. He reports spending significantly more time outdoors than he did before — which, honestly, is the whole point.
Common Challenges and How to Overcome Them
Challenge 1: Persistent Cracks That Keep Reappearing
This is the most common frustration homeowners face when trying to apply overlays or stain over existing concrete. The problem isn’t the crack filler — it’s the underlying cause. Concrete moves due to temperature changes, soil settlement, and tree root growth. If you fill a crack and the same forces that created it are still active, the crack will reappear through your new surface.
Solution: For cracks wider than ¼ inch, use a flexible polyurethane or polyurea joint filler (not rigid epoxy) that can flex with movement. For cracks caused by tree roots, the roots need to be addressed first. For overlays specifically, use a fiberglass mesh tape embedded in the overlay product over each crack location — this bridges the gap and distributes stress across a wider area.
Challenge 2: Paint or Sealer That Won’t Bond
Many older patios have been previously sealed or painted with products that prevent new coatings from bonding. If you apply a stain or overlay over an incompatible existing coating, you’ll get peeling, bubbling, or delamination within months — a frustrating and costly mistake.
Solution: Test for existing coatings by dripping a small amount of water on the surface. If it beads up, a sealer is present and must be removed before you proceed. Use a chemical stripper designed for concrete (available at most hardware stores for about $20–$35 per gallon) or rent a floor grinder for larger areas. After stripping, the water should absorb into the concrete within a few seconds — that’s your green light to proceed.
Challenge 3: Door Clearance After Adding Thickness
Adding any covering material raises the patio surface. Even ¾ inch of height gain can cause a sliding glass door to drag, jam, or fail to create a weather-tight seal. This is a particularly common issue with interlocking tiles and thicker mortar-set tile installations.
Solution: Before purchasing materials, measure the clearance between your existing slab and the bottom of any sliding or hinged doors that open onto the patio. Most sliding glass doors have very little adjustment range (typically ¼ to ½ inch). If clearance is tight, opt for the thinnest available option — 12mm porcelain tiles, thin-set micro-toppings, or stain/seal (which adds virtually zero height). Alternatively, a carpenter can shave down a door’s bottom edge for around $50–$100.
Frequently Asked Questions
Can I install pavers directly over an existing concrete patio?
Yes, and it’s a popular option — though it sits at a slightly higher price point than the methods covered in detail above. Setting concrete or natural stone pavers over an existing slab using a mortar or adhesive bed typically costs $4–$9 per square foot in materials for mid-range pavers. The key requirements are a stable slab (minimal cracking), adequate drainage planning, and attention to the height gain at door thresholds. Dry-lay (sand-set) pavers over concrete are also possible using a thin sand bedding layer, though this is better suited to professional installation to ensure proper compaction and leveling.
How do I know if my concrete patio needs to be replaced rather than covered?
Covering is appropriate when the slab is structurally stable but cosmetically damaged. Replacement becomes necessary when: sections have heaved more than 1 inch out of plane, large areas (more than 25% of the surface) are spalling deeper than ½ inch, there is significant rebar corrosion causing the concrete to expand and crack from within, or there are persistent drainage problems caused by improper original installation that can’t be solved with surface-level fixes. When in doubt, get a structural assessment from a licensed concrete contractor — most offer free estimates and can tell you definitively whether your slab is a candidate for covering.
What is the best low-cost patio cover option for cold climates with freeze-thaw cycles?
Freeze-thaw cycles are the enemy of most surface-bonded products. The safest budget-friendly options for cold climates are: interlocking composite deck tiles (they’re not bonded and can flex with seasonal movement), frost-resistant full-bodied porcelain tiles installed with a flexible polymer-modified mortar and elastomeric grout, or concrete stain with a high-quality penetrating sealer that protects the surface from water infiltration without creating a brittle film. Avoid standard ceramic tile, solvent-based surface sealers, and thin overlays less than ¼ inch thick — all are vulnerable to delamination when moisture freezes beneath them.
Your Patio Transformation Roadmap: From Dull Slab to Outdoor Living Space
Here’s the straight talk: transforming your concrete patio doesn’t require a big budget — it requires a clear plan. In 2026, with material costs still elevated and homeowners looking for smart ways to build equity and liveability without full-scale renovations, the covered-patio approach has never made more practical sense. Use this action-oriented roadmap to move from planning to completed project:
- Assess and repair your slab this weekend. Spend 30 minutes doing the crack, hollow-sound, and moisture tests described above. Patch anything that needs patching and let it cure fully (usually 24–72 hours).
- Choose your method based on your slab’s condition and your climate. Minor cosmetic issues? Go with stain and seal. Good structural condition but want a real style upgrade? Resurfacing or interlocking tiles. Stable slab and long-term thinking? Invest in porcelain.
- Get a material estimate before committing. Measure your patio precisely (length × width = square footage, then add 10% for waste). Price out your top two options at a local hardware store and one online supplier — prices can vary by 20–35% between sources.
- Execute in the right weather window. Most surface treatments require temperatures between 50°F and 90°F with no rain forecast for 24–48 hours. Plan your project date around your local forecast.
- Seal and protect your investment. Whatever method you choose, finishing with an appropriate sealer doubles or triples the lifespan of your work. Budget $30–$80 for a quality sealer — it’s the most important dollar you’ll spend on this project.
The broader trend is clear: outdoor living spaces are commanding a growing premium in residential real estate in 2026, with Remodeling Magazine’s annual Cost vs. Value report consistently showing patio improvements among the top ROI projects for homeowners. A well-executed patio upgrade doesn’t just make your home more enjoyable — it makes it more valuable.
So here’s the question worth sitting with: What’s stopping you from turning that neglected slab into the outdoor space you’ve always wanted — starting this weekend? The tools are accessible, the budget is achievable, and the results, as you’ve seen, can be genuinely remarkable. Your patio’s best chapter is still unwritten.